How to Take Your Own Passport Photo at Home (And Get It Accepted)
Edited by Bobby Hess | FreePassportSnap.com
Author: FreePassportSnap
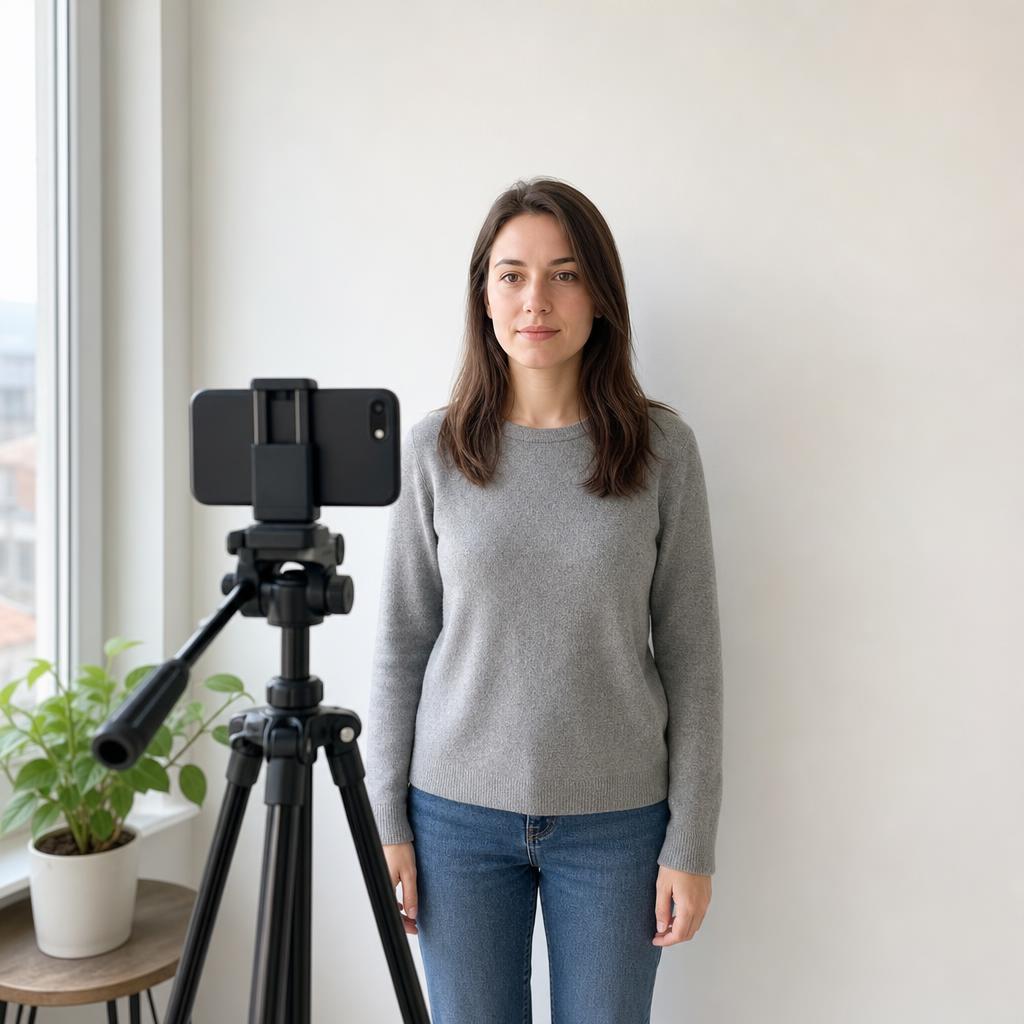
Taking your own passport photo at home is completely allowed by the U.S. Department of State — and with modern smartphones, it's easier than you might think. You don't need a professional photographer, a drugstore kiosk, or expensive software. You need a plain white wall, decent lighting, and a few minutes.
This guide walks you through everything: how to set up your shot, what to wear, common mistakes to avoid, and how to get a properly sized photo ready to submit.
What You'll Need
- A smartphone with a good camera (most modern phones work great)
- A plain white or off-white wall or background
- Natural light from a window, or two lamps positioned on either side of your face
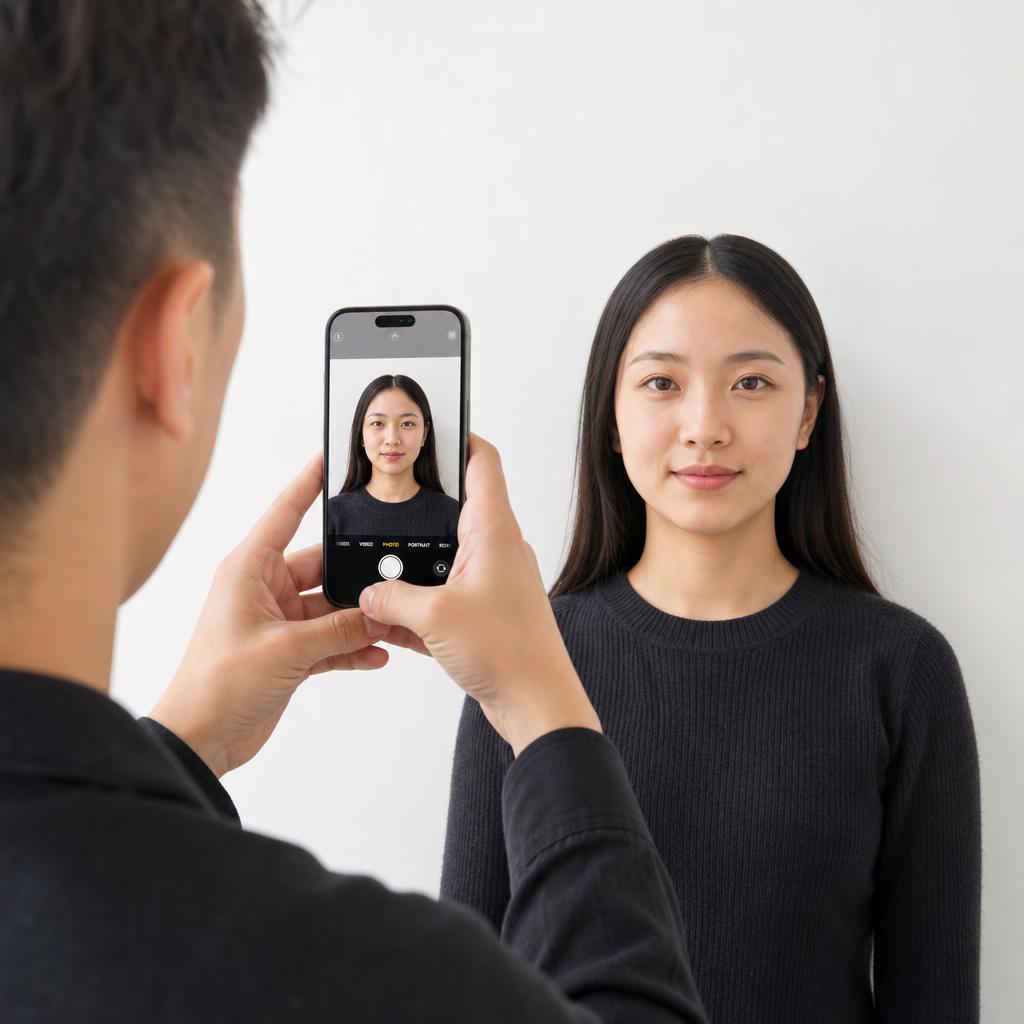
- A tripod or a surface to prop your phone on — avoid selfie mode
- A friend or family member to press the shutter (optional but helpful)
Step 1: Find the Right Background
U.S. passport photos require a plain white or off-white background with no shadows, patterns, or objects behind you. A plain painted wall, a white door, or a white bedsheet hung flat all work well.
Stand a few feet away from the wall or sheet — this helps avoid shadows falling behind your head. If you stand too close, your shadow will appear on the background and your photo may be rejected.
Step 2: Get the Lighting Right
Lighting is one important factor in whether your home passport photo meets the requirements. Bad lighting causes shadows across your face, harsh glare, or a background that doesn't look white enough.
- Natural light from a large window is ideal — face the window so the light falls evenly on your face.
- Avoid direct sunlight — it creates harsh shadows and squinting.
- If using lamps indoors, place one on each side of your face at roughly the same height to create even lighting.
- Avoid overhead lighting only — it creates dark shadows under your eyes and nose.
- Check your photo: if you see shadows on your face or a dark patch behind your head, adjust your position or lighting before continuing.
Step 3: Position the Camera Correctly
The camera should be at eye level and roughly two to four feet away from your face. Using a tripod or propping your phone on a shelf gives you a stable, consistent shot.
Important: avoid using the front-facing (selfie) camera if possible. Most smartphones' rear cameras produce sharper, higher-quality images. Use the timer or have someone else take the photo.
- Camera should be at eye level — not above or below.
- Keep your head centered in the frame with some space above your head.
- Your full face and the top of your shoulders should be visible.
- Do not crop into the top of your head.
Step 4: Check Your Expression and Appearance
U.S. passport photos require a neutral expression or a natural, relaxed smile with both eyes fully open and looking directly at the camera.
- Neutral expression or a natural smile — no exaggerated expressions.
- Both eyes must be fully open.
- Look directly at the camera lens, not at the screen.
- Remove eyeglasses unless you cannot remove them for medical reasons; the State Department requires a signed doctor’s note for that exception.
- Remove hats and head coverings unless worn daily for religious or medical reasons.
- Keep hair away from your eyes — your full face must be clearly visible.
- Wear everyday clothing. Avoid white tops if possible, as they can blend into the background.
Step 5: Take a Lot of Photos
Don't take three shots and call it done. Take 20, 30, or even 50 photos and pick the best one. Vary your expression slightly, check your lighting after each burst, and look for any shadows or issues. The perfect shot is usually somewhere in the middle of a long session.
What Makes a Passport Photo Get Rejected
The most common reasons passport photos are rejected:
- ❌ Shadows on the face or background
- ❌ Background is not plain white or off-white
- ❌ Eyes are closed or looking away
- ❌ Glasses worn in the photo
- ❌ Hat or head covering (unless for religious/medical reasons)
- ❌ Photo is blurry or low resolution
- ❌ Filters, AI enhancement, or digital editing applied
- ❌ Head is tilted, turned, or not centered
- ❌ Selfie mode distortion (wide-angle effect)
- ❌ Photo is more than six months old
- ❌ Incorrect size — must be exactly 2 × 2 inches
Do I Need to Print It?
It depends on how you're applying. If you're applying in person at a passport acceptance facility, you'll need a printed 2 × 2 inch photo on high-quality matte or glossy photo paper. Ask the provider about its actual price, paper and print scaling before ordering; measure a test print rather than assuming a low-cost standard print is correctly sized.
If you're renewing your passport online through the official U.S. Department of State system at opr.travel.state.gov, you'll upload a digital photo instead of printing one. The file must meet all the same requirements, but you won't need a physical print.
Official U.S. Passport Photo Size Requirements
- Photo size: exactly 2 × 2 inches (51 × 51 mm)
- Head size: 1 to 1⅜ inches (25–35 mm) from chin to top of head
- Color photo taken within the last 6 months
- Plain white or off-white background
- High resolution — sharp, in focus, not blurry or grainy
- No filters, AI edits, or digital alterations of any kind
Quick At-Home Passport Photo Checklist
- ✅ Plain white or off-white background
- ✅ Even lighting with no shadows on face or background
- ✅ Camera at eye level, 2–4 feet away
- ✅ Rear camera used (not selfie mode)
- ✅ Full face visible and centered
- ✅ Neutral expression or natural smile, eyes open
- ✅ No glasses, hats, or face coverings
- ✅ No filters or digital editing
- ✅ Photo taken within the last 6 months
- ✅ Correct size: 2 × 2 inches (or properly cropped for digital submission)
Official U.S. passport photo requirements from the Department of State:
travel.state.gov — Official U.S. Passport Photo RequirementsOnce you have a good photo, use FreePassportSnap.com to instantly crop and resize it to the exact 2×2 inch U.S. passport format — completely free, no watermark, no registration required.
Create Your Free Passport Photo →Related guides
A practical retake setup: solve the problem before editing
For a U.S. application, start with an original, unaltered photograph. If a background, shadow or facial detail is unsuitable, fix the physical setup and take another picture instead of digitally replacing it. These are capture instructions, not a promise that a tool will make an unacceptable source photo acceptable.
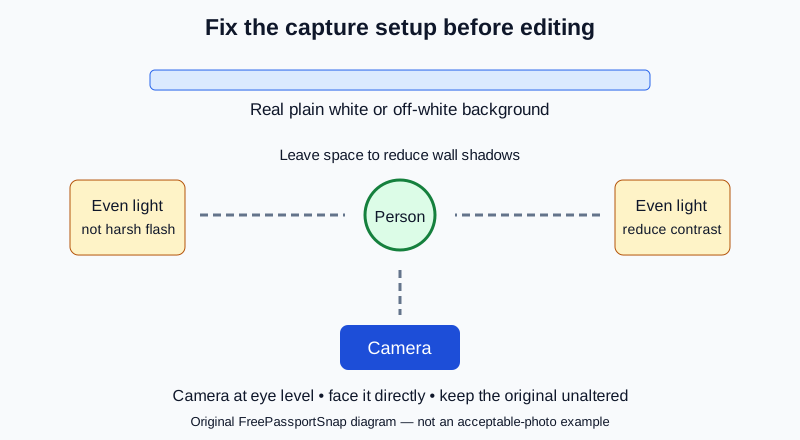
- Place the person in front of a real plain white or off-white background, with space behind them to reduce a wall shadow.
- Keep the camera at eye level and face it directly. Ask another person to take the photo rather than relying on a close selfie.
- Use even light on both sides. If one side is dark, move the person or light source; do not erase the shadow afterward.
- Take several original frames. Compare sharpness, open eyes, visible head and natural skin tone before selecting one.
Print the preparation checklist and keep it beside your camera. Compare the final original with the State Department examples, not just an automated readiness label.
Previous
How to Take the Perfect Baby Passport Photo at Home
Next
International Travel Planning Checklist: Passport, Visa, and Document Timeline
You Might Also Like
How to Take a Child's Passport Photo at Home (Ages 2–10)
Toddlers fidget, older kids make faces, and nobody sits still on command. Here's how to get a U.S. passport-accepted photo of your child at home — without a studio or a meltdown.
How to Take a U.S. Passport Photo at Home With an Android Phone
You don't need a photo studio. Your Samsung, Pixel, or any Android phone can take a passport photo the government will accept — if you get these details right.
How to Take a U.S. Passport Photo at Home With an iPhone
Your iPhone is already capable of taking an accepted U.S. passport photo. Here's exactly what to do — and what to avoid — to get a photo that won't be rejected.